
The plugin of Gravity forms in WordPress, hardly allows users to create Multilevel Columns through any in-built feature, but CSS classes can help you do this.
Since the plugin does not provide the facility to align fields of the form according to the needs of various websites, this has remained a troubling situation for developers for a long time. However, with the development of relevant functional CSS classes, it became easy for the WordPress developers to get a gravity forms layout in Multilevel Columns. Developers these days, use ready CSS classes for gravity forms’ styling and apply custom CSS on the form’s structure to achieve desired results.

In this blog, we shall get a quick insight on how to apply CSS classes on forms and tweak the form with your custom CSS code to get wishful results on the WordPress website. So, without further ado, let’s jump into our easy-breezy tutorial on making Multilevel Columns layout in forms.
Create a Gravity form
Before any tutorial of Gravity form styling, you need to create a simple form through the Gravity Form Plugin. Go to the ‘Add New Plugin’ option in the sidebar of WordPress Dashboard, and then search for ‘Gravity forms Plugin’. Install the plugin and Activate it right away.
Once it’s activated, create a new form and fill in the required labels of fields or edit the number of fields as per your need.
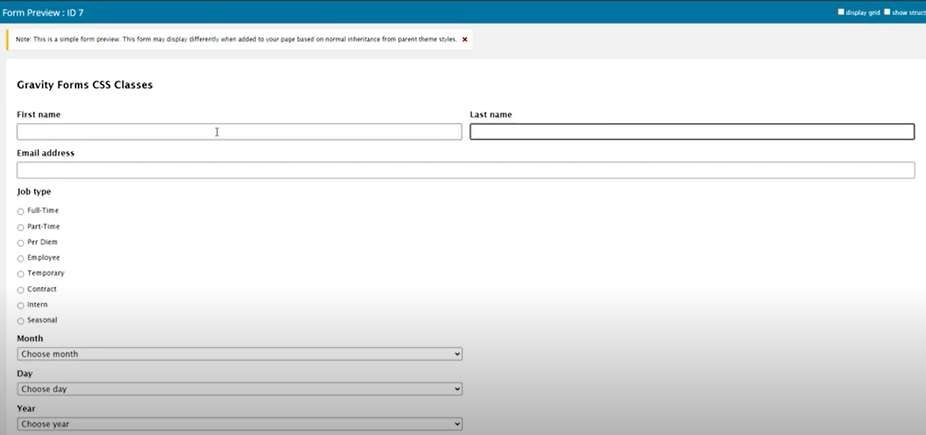
After Editing the form, click ‘Save’ to get it ready for the application of gravity forms CSS classes. And if you preview it, ideally it should look like this.
Applying Gravity forms CSS classes
Now it’s time to jump at the backend coding of the form on your WordPress website that you just created. Click on the ‘Forms’ tab on the sidebar to view the overall fields of the form and add gravity form CSS classes.
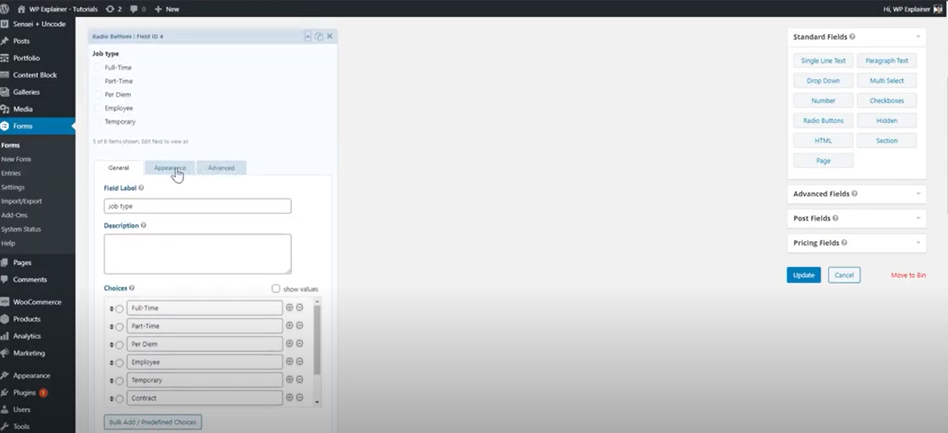
Click on the Appearance tab of the form to apply relevant CSS classes on the form. For example, here we First name and the last name fields appear side-by-side on the form. So, open up the field and then click on the Appearance tab.
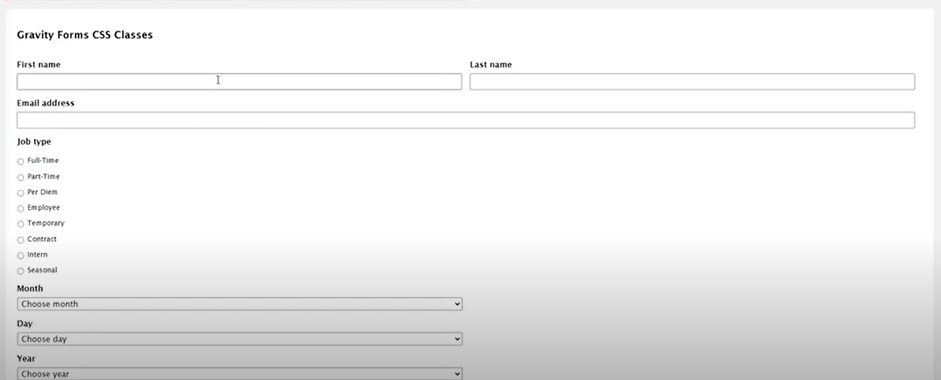
For the field of the First name, under Custom CSS class Section type ‘gf_left_half’ to align it on the left. And similarly for the field of the Last name, type ‘gf_right_half’ under the custom CSS section. Ideally, this is how it will look like.
Also, You can align the fields, submit buttons, or radio buttons into several columns by opening that widget and click on ‘Appearance’ and type ‘gf_list_3col’ as shown in the video tutorial of styling gravity forms layout, listed down here.
There are various CSS classes for styling forms in multilevel Columns layout such as gf_left_third, gf_middle_third, gf_right_third to align 3 widgets in the same line. Moreover, gf_list_inline is to bring radio buttons in the same line whereas, gf_inline is to bring all kinds of fields in the same line. You can explore several other classes through the official manual website of the plugin.
Manual Gravity Forms CSS
The idea here is that users can tweak their forms through hard code CSS as well. For instance, fields and buttons can be aligned in the same line to ensure perfection in positions as portrayed in the video.
This feasibility to style the gravity forms in Multilevel Columns through CSS classes helps users to implement highly optimized forms in terms of space and style.